Money Tracker lets you import transactions from files such as CSV or Excel (XLSX). You can import files exported from Money Tracker itself, bank statements, or your own spreadsheet records.
This guide will walk you through the process step by step.
Step 1: Open Import & Choose File
- Open Money Tracker
- Tap More form the bottom navigation
- Select Import
- Choose File
- Select a file in CSV or XLSX format
- Supported sources:
- Money Tracker export files
- Bank Statements
- Personal Excel or CSV records
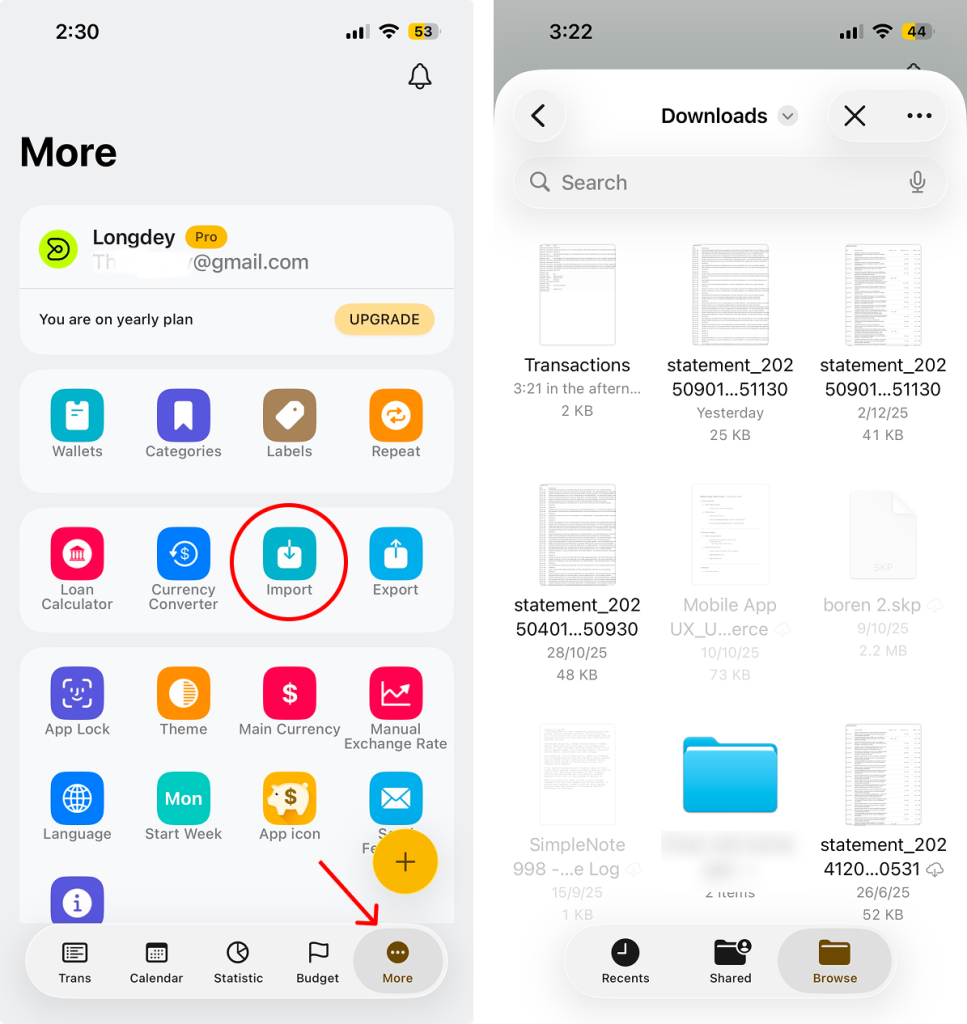
💡 Files exported from Money Tracker usually work best. Bank or custom files may need small adjustments.
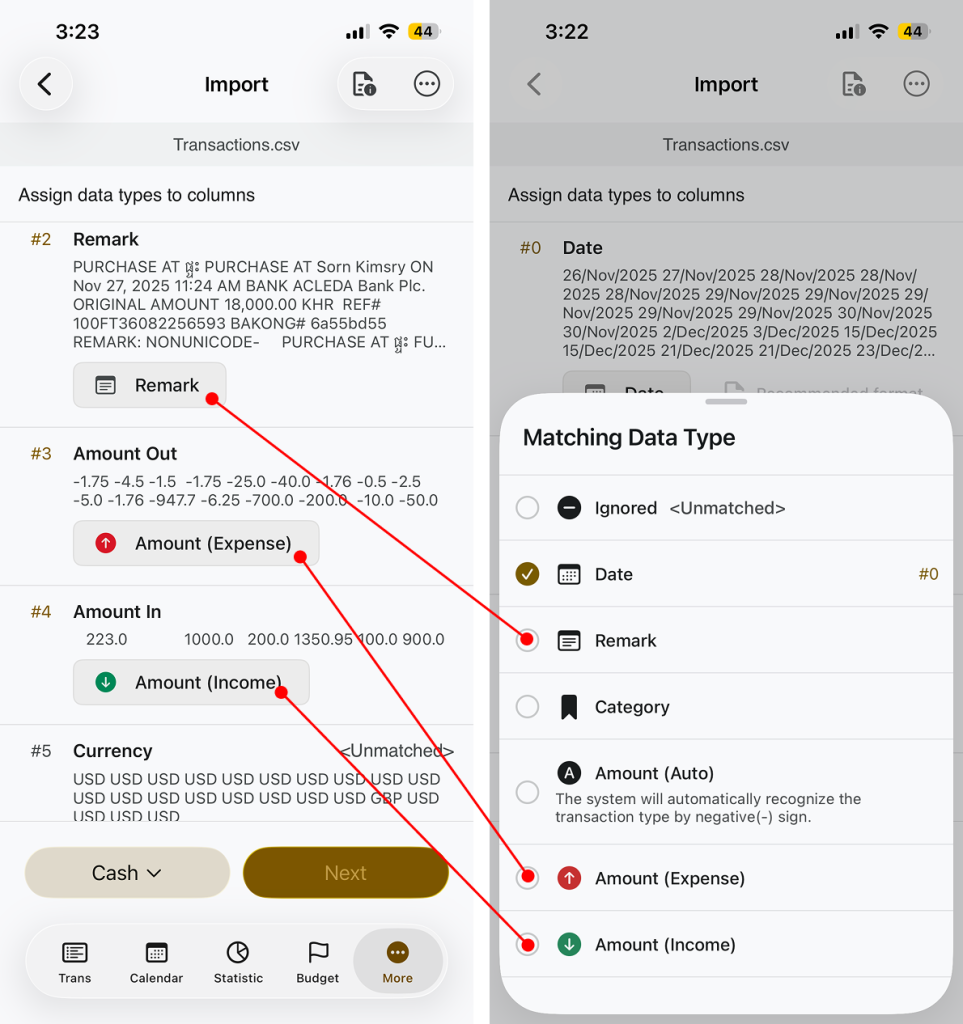
Step 3: Assign Data Types to Columns
Money Tracker needs to know what each column represents.
For each column, assign a matching data type:
- Date
- Category
- Remark
- Amount(Auto)
- Automatically detects income or expense using negative(-) values
- Amount(Income) or Amount(Expense)(If separated)
- Ignore(for columns you don’t need)
This step is required before continuing.
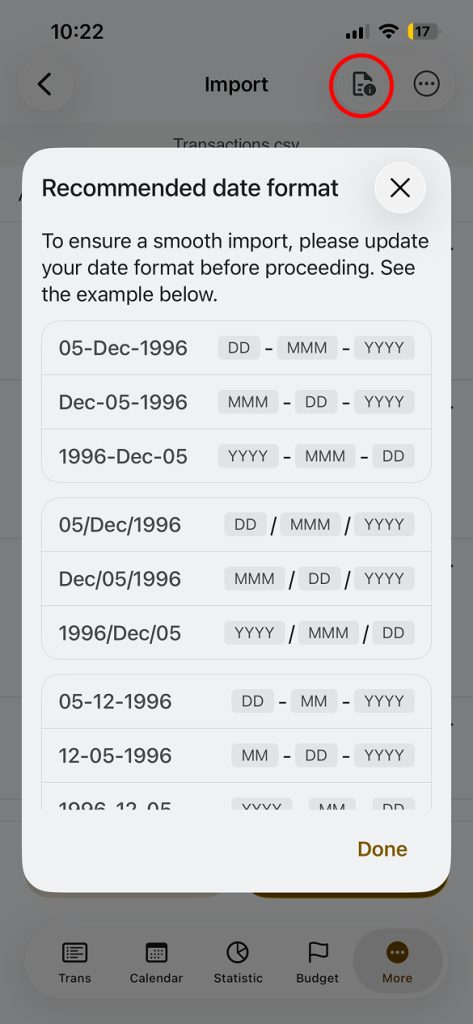
Step 4: Check Date Format (Important)
Date format is the most important part of importing.
- Money Tracker support specific recommended date formats
- If your file uses a different format, you must:
- Edit the file first(Excel or CSV)
- Then import again
Supported Date Formats
Money Tracker supports the following date formats. Please make sure your file uses one of these formats before importing:
Using month name(MMM):
05-Dec-1996 (DD-MMM-YYYY)
Dec-05-1996 (MMM-DD-YYYY)
1996-Dec-05 (YYYY-MMM-DD)
05/Dec/1996 (DD/MMM/YYYY)
Dec/05/1996 (MMM/DD/YYYY)
1996/Dec/05 (YYYY/MMM/DD)
Using number only:
05-12-1996 (DD-MM-YYYY)
12-05-1996 (MM-DD-YYYY)
1996-12-05 (YYYY-MM-DD)
05/12/1996 (DD/MM/YYYY)
12/05/1996 (MM/DD/YYYY)
1996/12/05 (YYYY/MM/DD)
Important Note:
- Date format must be consistent across the entire file
- If your file uses a different format, update it in Excel or CSV before importing
- Incorrect date format may cause import failure or incorrect dates
You can see the recommend format by tap on info icon on Top navigation bar.
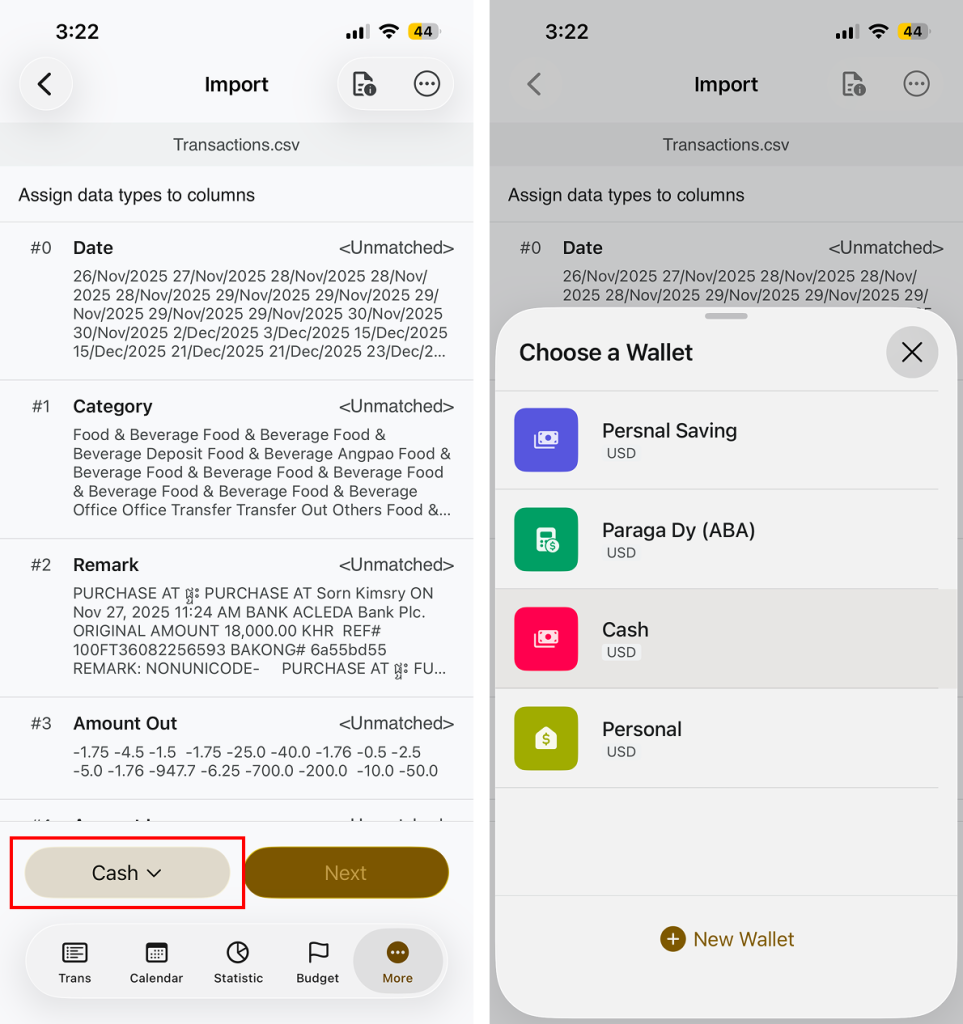
Step 5: Choose Wallet Carefully
- Imported transactions are added to the currently active wallet
- By default, this is the wallet selected in the top action bar
- No currency conversion is applied
All imported amounts are treated as the selected wallet’s currency.
Make sure you choose the correct wallet before importing.
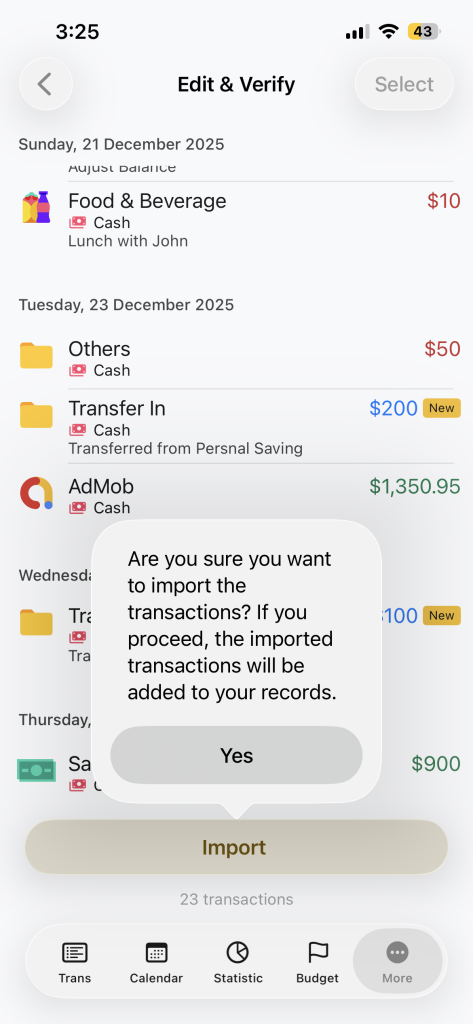
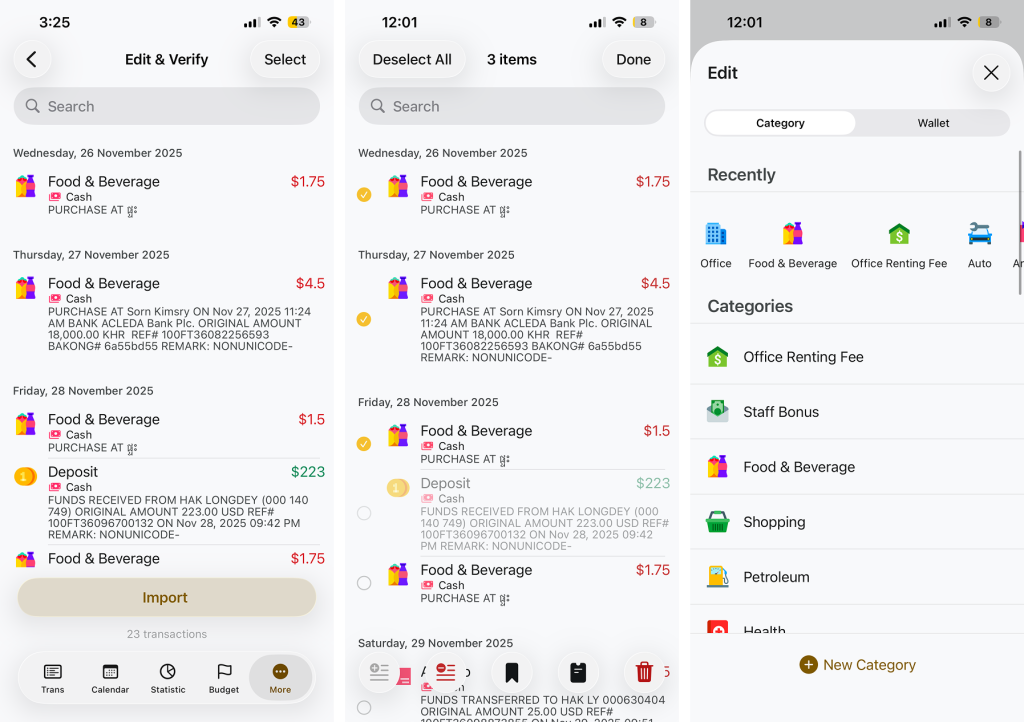
Step 6: Verify and Edit Transactions
Before final import, you’ll see the Edit & Verify screen.
Here you can:
- Review all imported transactions
- Edit cateogries
- Delete unwanted items
- Use bulk selection for assign category or deletes multiple item at once
Category behavior
- If a category does not exist, Money Tracker will create it automatically
- Income amounts appear in green
- Expense amounts appear in red
- You can reassign categories manually during verification
Step 7: Import and Confirm
- Tap Import
- Confirm the action
All Transaction will be added to your records.